Simple DIY Projects: Upcycling Furniture for Sustainability
- Christine Martin
- Jun 22, 2017
- 3 min read
Updated: Apr 1, 2020

Most furniture shoppers know this struggle: looking for an item in mind that seems impossible to find or buy at a reasonable price. This is where ‘up cycling’ or ‘hacking’ is a life saver. You save the cost of buying the item new, and you can personalize it exactly how you imagine. Not to mention the sustainability aspect, since lord knows there are enough Ikea remnants in land fill sites around the world. This blog will focus on one of the easiest DIY projects – repainting.
Project # 1 - Ikea’s ‘Hemnes’ nightstand hack

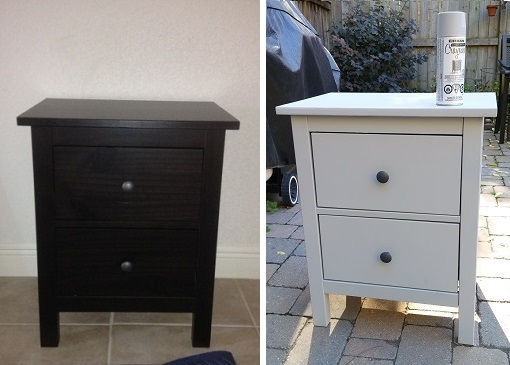
This bedside table is a super popular item at Ikea, which means that it is also pretty easy to find second hand. The 2 drawer chest retails for about $100 at Ikea (in Canada), however I picked one in good condition up for $30 flat (on Kijiji – the Canadian version of Craigslist). The black-brown finish was a bit faded, but who cares! We are painting it anyways.
Tip: You don’t need to sand off the old paint. Ikea uses some pretty hardcore primer which is difficult to get off – and if you do, you will notice some pretty funky patterns in your coats of paint from the low quality grain underneath. I would recommend just giving it a light sanding to remove any loose paint and to smooth it out.
Once you have removed any dust, you are ready to paint. I chose chalk paint to give the bedside table a more rustic / vintage look. The color I chose was ‘Aged Grey’ (Rust-oleum Chalked Spray Paint) – and coincidentally there was a picture of a nightstand on the can.

Next steps:
1. I removed the drawers and taped plastic bags around the ‘inside’ part of the drawer to leave it it’s natural color.
2. I also removed the knobs since I wanted to leave those the stock dark color.
3. Once ready to paint, I applied three light coats and waited 10 minutes between each coat – but follow the instructions on the spray paint that you choose.
4. Let the nightstand dry completely before putting the drawers back in. Hopefully you will be as satisfied with the end result as I was!
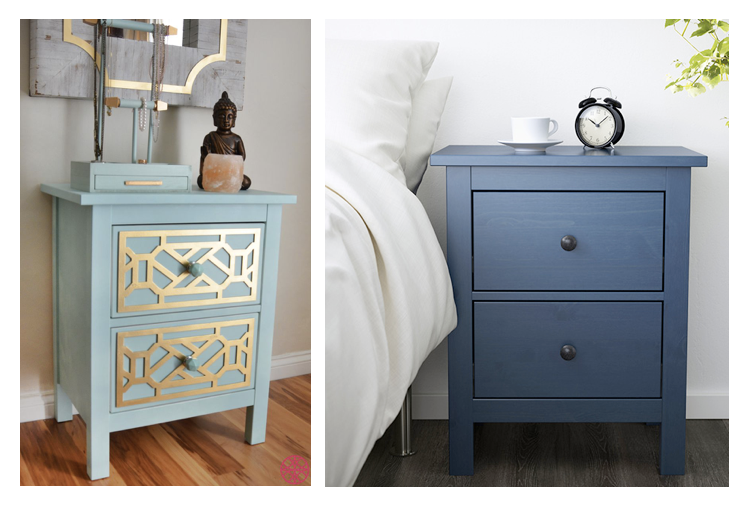
For those wanting to get more crafty, play around with color, change out the knobs or paint on a pattern to your nightstand for added design impact.

Project #2 - DIY Patio Table Upcycle

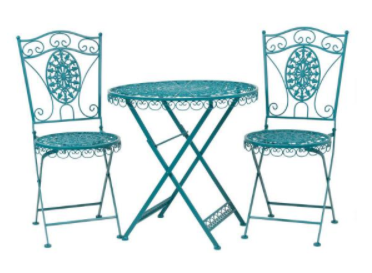
When I moved into a condo with a balcony, I knew that I needed to find a suitable patio set. There was a great teal outdoor table and chairs at Urban Barn (see above), but I couldn’t justify the $350 cost with all of the other expenses of moving into a new place. It just so happened that my parents were getting rid of their bistro set at the time so I called dibs on it right away.

I immediately knew how to awaken the tired looking set of table and chairs – with a new paint job! And why not try to replicate the set that I had my eye on, by choosing a similar color?
A trip to the local hardware store yielded some promising results – I was choosing between Krylon’s ‘Sea Foam’ or ‘Ocean Breeze’. I decided on Sea Foam because it is a bit darker in color - as opposed to a lighter shade of aqua / teal which was a bit too bright for my liking.
Tip: To prep the furniture I washed it with a hose on the high pressure setting. Wait for it to dry and sand off any imperfections. Wipe off any remaining dust and you are now ready to paint!
This project will use more spray paint than the nightstand, but the Krylon variety should be much less expensive than the chalk paint that was used on the nightstands.
Next steps:
1. I began painting and covered all pieces with an even, light coat.
2. I waited about 10 minutes between each coat and called it quits after about 3.5 cans were used.
I was super happy with how it turned out, and it cost under $20 in spray paint (compared to the $350 set I had my eye on). All in a day’s work!


Both of these projects were quick, economical and in the end something that I am proud to have in my home. Check out Bachelor on a Budget for more inexpensive items and ideas for your abode.

